

I found these excercises to be very mesmerizing -- the time went by so fast! So here are my first pictures of an altered square, circle, and leaf. For the most part, too grid-like for my tastes, but I hope that will work itself out in time.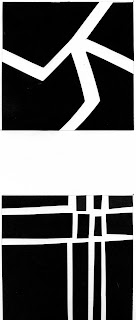

 Finally got down to doing exercise1. Not entirely satisfied with the end product, but much interested in the process. Loads of fun and i think i'm going to spend some time on it to really juice it out. Perhaps it would be a good idea to work with all the basic forms before moving on to ex#2.
 This is the exercise from Exercise One that suggests enlarging and/or reducing some of your shapes and then combining them. I used Adobe Photoshop Elements to do this and found it fairly easy. I can envision using parts of these shapes in future quilts, maybe with color.


 I seem to have been a bit obsessed with variations on this one.
 In the top one here I tore the card instead of cutting – but I did have to leave a couple of the smaller bits out to make it all fit in and of course, that goes against what the exercise said to do.
 On this page I decided to draw a square, cut shapes and fit them in. This is not quite as easy as it sounds. Maybe I should have cut the black card square a lot smaller than the drawn square.
 I scanned three of the designs in then played around in PSP and used the displacement filter.
 I quite like the last one which looks a bit ‘fluffy’.
 Also want to try and make some stamps with this. Saw it on the Traci Bautista DVD. Its a bit squishy though so probably won’t get a sharp outline. Anyone else used one of these before?
 Going to try and carve six stamps a week in one sitting rather than one a day for 30 days. Will see how I get on.
 I found these very soothing to cut. Especially the squares above. I have found out in the last few years that I really like squares. After I pasted the pieces, I noticed the top one looks like a monkey. Can you see it?
  The rectangles were my first ones to cut and I didn't like the shape so much. But I see how I can make squares out of them.
 My leaves resemble footballs or is it because we watched football yesterday. Now to expand or shrink some of these.


 These are stamps made by cutting out phun foam and glueing it on plastic lids. I think the almost clear lids will make it easy to place the stamps - except of course, on black fabric.


